Hello, readers! Although we are no longer posting new items on our blog, we are keeping it available so you can browse through our past posts. Thanks for visiting!

Feb 28, 2011

{St. Patrick's Day Printable}

Tomorrow is March!  Can you believe it?
That means
ST. PATRICK'S DAY
is heading our way.
Break out the green and get your jig on!

Here's a free printable you can use for any ideas you can think of:
cards, tags, printed/framed, class treat bags, etc.
(for your own personal use, of course)

Small:


Medium:


Large:


Enjoy!

-Annie

(p.s. We've got a crafty giveaway planned for tomorrow...stay tuned!)

*Please click HERE to see the lovely linky parties we participate in!*


Pin It

Feb 24, 2011

{Bathroom Door Makeover}


... a wordless tutorial ...

...   ...   ...


-Annie

(pssst .... I found the wood cutouts at Michael's craft store)

*Please click HERE to see all the lovely linky parties we participate in!*


Pin It

Feb 21, 2011

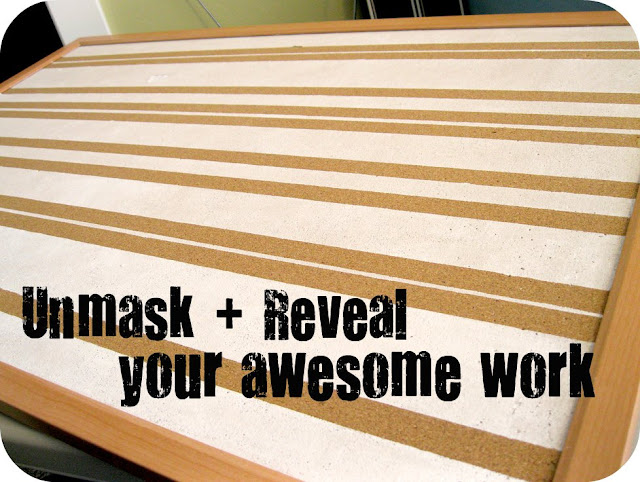
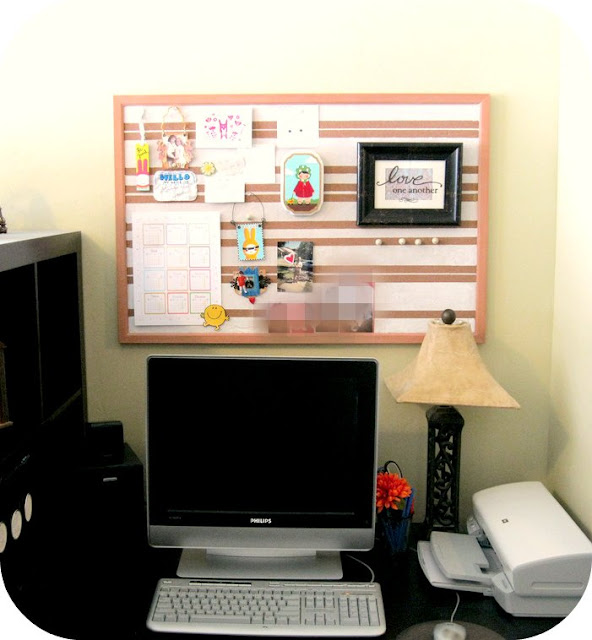
{Cork Board Makeover}


I've had this cork board hanging up in the office above the computer desk area since we moved into our tiny little condo 16 months ago.

It was new when we bought it, despite the nicks and gouges you see here. 
These little buggers are quite fragile!
(helpful hint:  don't stick anything up with tape)

I hated the look of it.
The orangey "wood" frame and the boring brown cork itself -- ugh.
I pretty much just covered it with stuff to block it out.


Today, I decided enough is enough.
I'm going to make that baby shine!

My original plan was to not only paint the lines on the cork, but also to paint the wood frame in a bright turquoise.  Unfortunately, the finish on the "wood" frame does not accept paint! Since I don't own a power sander that I could use to sand it down and make it more porous, I'm leaving it plain for now.  I will probably hot glue some ribbon around it in the near future.

Here's the How-To:


Too easy, right?

I think it adds just the right amount of design element to this area that gets a lot of use in our house.

Can't wait to finish it off with the ribbon border! 
I'm thinking a velvety turquoise ribbon will look splendid.

Enjoy!

-Annie
Pin It

Feb 18, 2011

{Keys and Knobs}

  
I've been collecting antique-looking keys and doorknobs for a few years now...hoping that one day I could do something really cool with them. I've just been tucking them away in a trunk, but never knowing how to display them properly.

Then one day I was checking out one of my favorite blogs, Joys of Home, and I saw that Joy had the most gorgeous display of keys and knobs and keyholes!


I fell in love with it and decided it was time to make my own wall display. One of the things I love best about Joy's display is the dark wall color with the light accessories...but, unfortunately that wasn't an option for my space, so I had to go for the opposite look on the light-colored wall of my living room.


They are hung above my stack of trunks. I love old trunks...and the more beat-up they are the more attracted I am to them. I like to imagine what they were once used for and about the lives of their previous owners.

The bottom one was an awesome craigslist find, the middle one was a $5 steal at a consignment shop, and the top one actually belonged to my husband's great uncle, Clay, who fought in WWI...it's one of the few real antiques in my house that has some rich family history and that makes me love it so much more.

So there you have it, my own display of knobs and keys. The strangest things make me really giddy sometimes.

--Tammy

*Click HERE to see all the Linky parties we participate in!*

Pin It

Feb 17, 2011

{Bathroom Makeover}

A few months ago we gave our main-floor bathroom a much-needed makeover.

Let me just give a disclaimer that this room is nearly impossible to get decent pictures of...it's a tight, weird space with bad lighting and a huge mirror. The new color of the walls is quite a bit duller in real life than it looks in these pictures.

When we moved into this house in 2003, I had a momentary lapse in judgement and painted my bathroom yellow. I'd always wanted a yellow bathroom for some reason, even though I've never been a huge fan of the color. I almost immediately regretted it, and THEN...I had another lapse in judgement....that lasted seven years.
It wasn't that I was lazy and didn't want to do the work to re-paint it. Well, maybe I'm a little lazy. But it was mainly because I'm stubborn.
I wanted yellow, I painted it yellow, and I'm darn well going to live with the yellow.
I wonder about myself sometimes.

Anyway...onto the visuals:

Before:


I'll bet you agree...the yellow and blue had to go.

After:


We painted the walls in Behr's Mother Nature:


(I told you the pictures don't show the true color!)

We added beadboard wainscoting and painted it white,


changed out the shower curtain,


and added some fun accessories.


I found this metal clock at a thrift store...it was white but I spray-painted it glossy black and added a new timepiece so that it actually works.


We made some very simple changes over a long weekend and we are loving the results! I should never have waited SEVEN YEARS!

--Tammy
*Click HERE to see all the Linky parties we participate in!*
Pin It

Feb 15, 2011

{Jute-Wrapped Pot}

I have a quick and easy craft for you today.


A couple months ago I found this artificial potted plant at IKEA.
I'm not usually a fan of fake plants, but this one was different and realistic-looking and it kept calling my name as I walked by.
I snatched it up and drove the 500 miles home to put it in my kitchen's bay window. But right away I knew something had to be changed...the shiny, light-reflecting plastic pot.


I remembered seeing this post last year, and thinking how easy it would be to wrap something in jute...how it completely changes the look of whatever you wrap.

So...I decided to give it a try.

I bought some jute at Hobby Lobby and got out my trusty little glue gun and started wrapping...


...and 10 minutes later I have just the pot I was hoping for!


So easy.

Now I'm going to look around my house for something else to wrap in jute.
I'll keep you posted....

--Tammy

*Click HERE to see all the Linky parties we participate in!*
Pin It

Feb 11, 2011

{Altered Coaster Valentine Art}


We were lucky enough to be asked to take part in Annalea Hart's Gifts From The Heart guest-hosting series this week.
I chose to share this craft with all of her lovely readers and now I'm sharing it with all of you!
 
Altered Coaster Valentine Art


Supplies you will need:


* coasters
* ribbon
* patterned cardstock paper
* vinyl or sticker words/images
* glue stick
* glue gun
* scissors
* sanding block/sandpaper

Start by wiping off the smooth face of the coasters you are going to use.
If you get them from a thrift store like I did, you will want to clean them thoroughly before handling them.

Run the glue stick all over the top of the coaster, making sure to get all of the corner edges as well.
Press the coasters onto the back of the patterned paper and hold tightly until the glue starts to dry.  Press all around the edges to ensure a good, tight seal.
Once the glue is dry, cut around each coaster and start to sand the edges of the paper off.  You will want to do this over a bag or the garbage, as the sanding causes lots of paper dust.
While sanding, you can rough-up the edges as well.  If your paper has a white core, it will end up looking like these.  If you want a darker edge, now is the time to ink, chalk or sponge-paint around the edges to get the look you want.
Decide where you want to add your vinyl/stickers and apply them to the coasters.

Now, lay out your ribbon and decide where you want to hot glue the coasters.
If your ribbon is plain, this wont matter.  Since I was using polka-dot ribbon, I wanted to make sure that the dots were spaced evenly underneath and in the middle of the coasters.
Use the hot glue gun to glue the coasters to the ribbon.
Finish the bottom end by cutting out a V-shape and make the top into any hanging shape you like best. Be sure to cut the ends of the tied ribbon in a V-shape as well, as it adds detail and the finishing touch.
Once everything is glued and tied and cut, it is ready to hang!


This project can be altered in so many ways to make it exactly how you like it!
You can change the colors, the paper, the ribbon, the words -- anything for any occasion.

I made a second version with the letters L O V E, so I could keep it hanging in my house all year long!
I chose yellow and white paper with black and white polka-dot ribbon to match the rest of the décor in my house.

This really is a fun and quick craft and is simple enough that your kids can help, or even make their own!


Now go.... be creative!

-Annie

*Click HERE to see all the Linky parties we participate in!*


Pin It
Related Posts Plugin for WordPress, Blogger...